Placoplatre is a versatile and widely used material in modern construction. Whether you’re working on a commercial or residential project, understanding how to properly use Placoplatre can ensure the success of your build. From creating smooth, strong walls to enhancing insulation, Placoplatre can be applied in various ways, providing long-lasting results.
In this guide, we will explore the key steps for using Placoplatre effectively, ensuring your project runs smoothly and meets the highest standards.
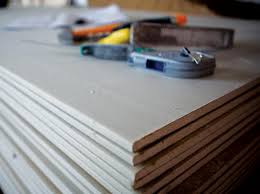
Preparation: Gather Your Tools and Materials
Before you begin using Placoplatre, ensure that you have all the necessary tools and materials. The key tools for installing Placoplatre include:
- Measuring tape: For precise measurements.
- Utility knife: To cut Placoplatre sheets to the required size.
- Drywall screws: For fixing the sheets to the wall or ceiling.
- Drywall adhesive: For additional support.
- Joint compound: To seal joints and edges.
- Sanding tools: To smooth the compound and achieve a flawless finish.
- Safety gear: Always wear protective glasses, gloves, and a dust mask when cutting or handling Placoplatre.
Measuring and Cutting Placoplatre Sheets
The first step in using Placoplatre is to measure the area where the sheets will be installed. Using a measuring tape, determine the length and width of the walls or ceilings. Ensure that you allow for any fixtures, windows, or doors.
Once the measurements are complete, mark and cut the Placoplatre sheets to fit the dimensions. To cut the sheets:
- Use a utility knife to score along the marked line.
- Snap the sheet along the scored line by applying pressure.
- Use the utility knife to cut through the backing paper to complete the process.
If you need to cut out spaces for electrical outlets or fixtures, carefully mark the positions and use a jigsaw or a handsaw for precise cuts.
Installing Placoplatre Sheets
With the sheets cut to size, the next step is installation. Begin by attaching the Placoplatre sheets to the wall studs or ceiling joists. If you’re working with a wall, ensure that the studs are spaced 16 inches apart (or as per the project requirements). For ceilings, the joists should also follow the proper spacing guidelines.
- Attach the sheets using drywall screws. Insert the screws about every 12 inches along the edges and studs.
- Ensure that the screws are slightly recessed into the Placoplatre, leaving a small indent to make it easier to apply the joint compound later.
- If necessary, apply drywall adhesive on the back of the sheet for added support.
Make sure that the sheets are aligned properly, and use a level to ensure that they are perfectly vertical or horizontal, depending on the installation.
Sealing Joints and Edges
Once the Placoplatre sheets are in place, the next step is to seal the seams between the sheets. This is done using joint compound. Follow these steps:
- Apply a layer of joint compound over the seams and screw indentations.
- Place drywall tape over the compound to reinforce the joint. Use paper or fiberglass tape, depending on the desired finish and project needs.
- Smooth the compound over the tape with a drywall knife, ensuring an even coat. Allow the compound to dry completely.
- Once dry, apply additional layers of joint compound as needed, smoothing each layer to create a seamless surface.
Sanding and Finishing
After the joint compound has dried, use a sanding block or drywall sander to smooth the surface. Sand the area gently to remove any rough spots or imperfections. Be sure to wear a dust mask to avoid inhaling any particles.
Once the surface is smooth, apply a final coat of joint compound if needed. After the final coat dries, sand again for a flawless finish. This ensures that the wall or ceiling is perfectly smooth and ready for painting or other finishes.
Painting and Decorating
Once the Placoplatre is installed, sealed, and sanded, it’s ready for finishing. You can paint the surface with any interior paint suitable for drywall. For additional protection, consider applying a primer before painting to ensure better adhesion and longer-lasting results.
Placoplatre offers an excellent base for all types of finishes, including wallpapering or applying textured coatings, depending on your design preference.
Conclusion
Using Placoplatre in your construction project can significantly improve the quality and efficiency of your work. From its easy installation to its ability to create a smooth and durable surface, Placoplatre is an excellent choice for residential and commercial projects. By following the proper steps—measuring, cutting, installing, sealing, and finishing—you’ll ensure that your Placoplatre installation looks professional and lasts for years to come.
Call to Action
Ready to begin your Placoplatre project? Contact us today to learn more about how Placoplatre can enhance your construction plans and to get expert advice on your next steps.